No-Bake Graham Cracker Crust Recipe (3-Ingredients)
This post may contain affiliate links. Please read our full disclosure policy.

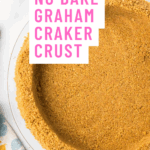
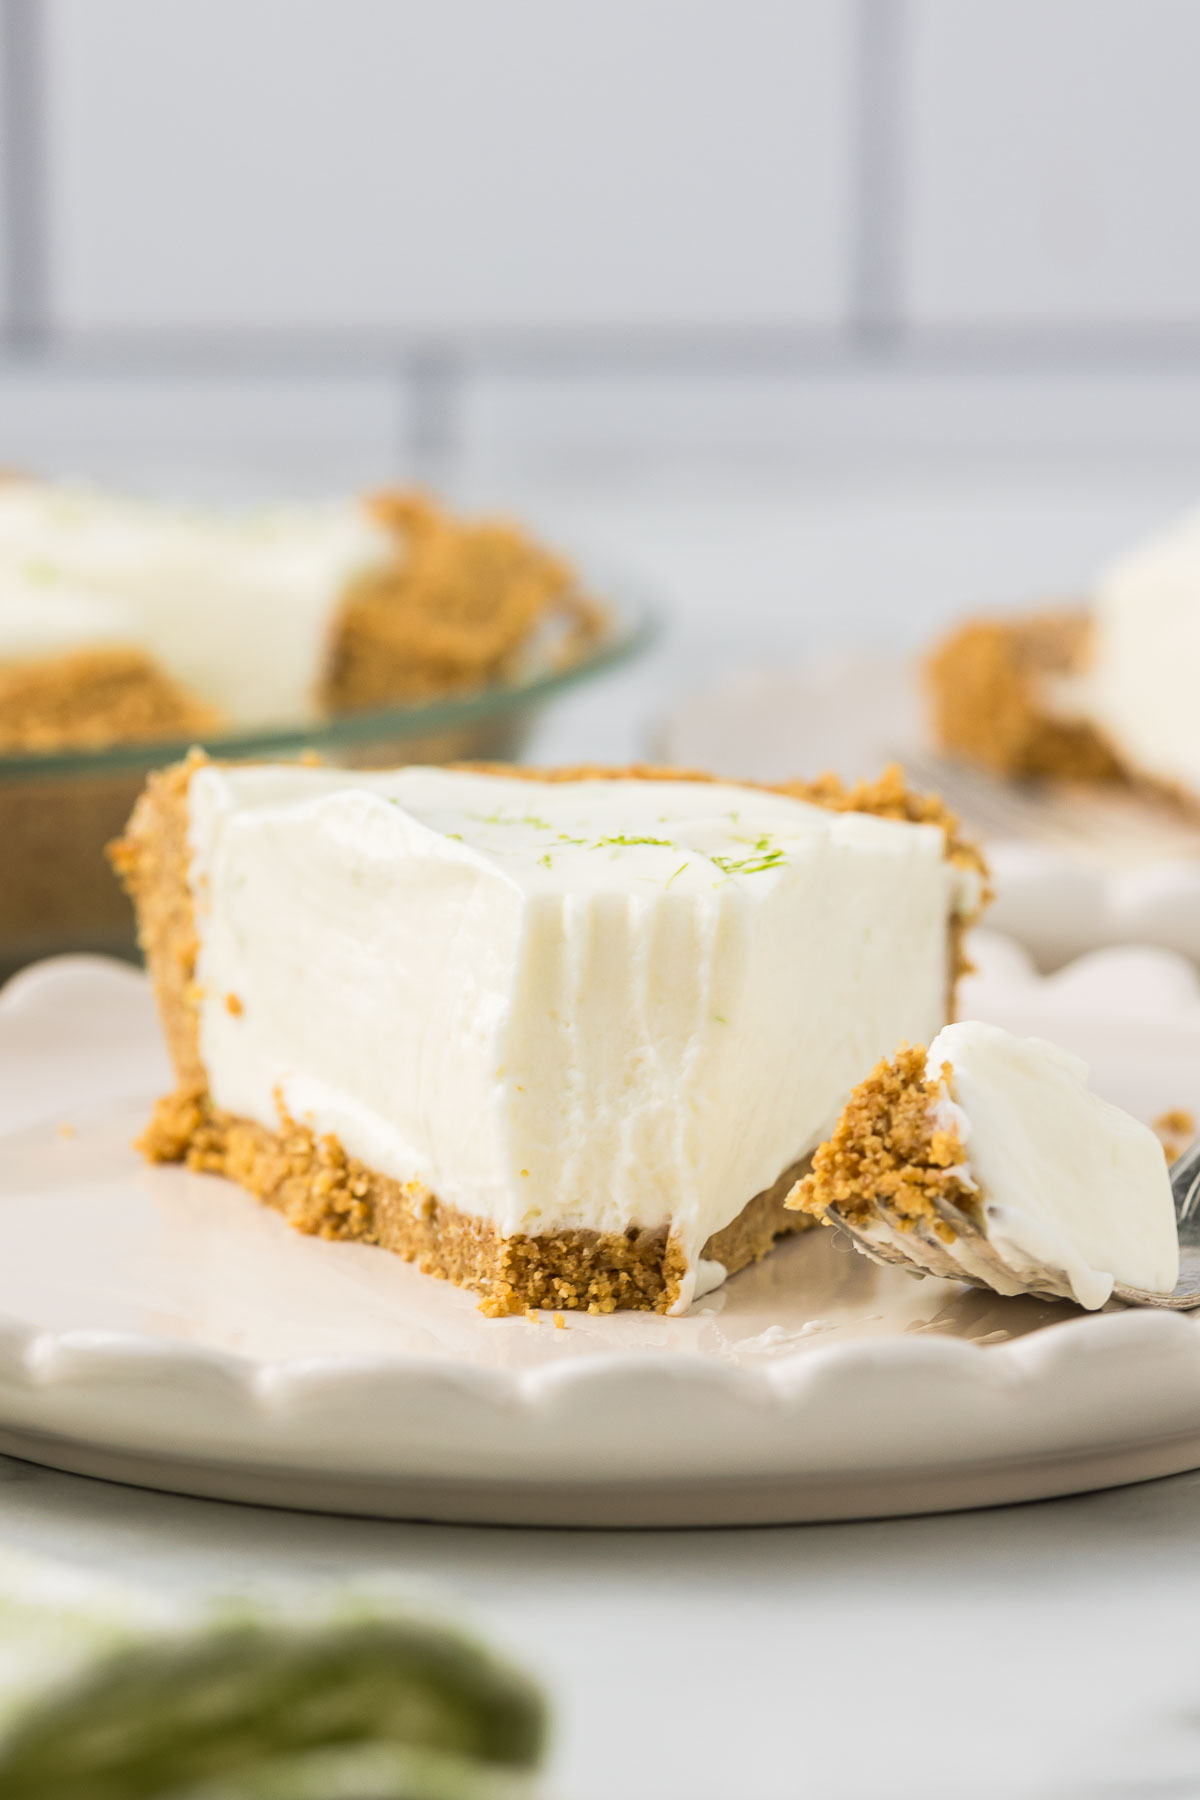
This No Bake Graham Cracker Crust recipe works wonders for any pie, baked or no-bake, and it’s seriously the best you’ll ever taste! Skip the store-bought stuff—this one is super easy to whip up and tastes way better.
This post may contain affiliate links. This means if you decide to purchase through my link, I may earn a very small commission at no additional cost to you.
I totally understand grabbing store-bought crusts when you’re short on time, but trust me, once you try making this homemade crust, you might never go back to pre-made ones. My favorite part of the crust it’s flavor is so versatile. It’s the perfect crust for key lime pie, lemon icebox pie, or peanut butter pie.
Plus, it’s foolproof and doesn’t even require baking. Go ahead and give it a shot—I bet you’ll be hooked!
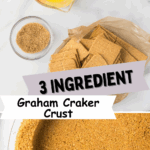
Simple ingredients
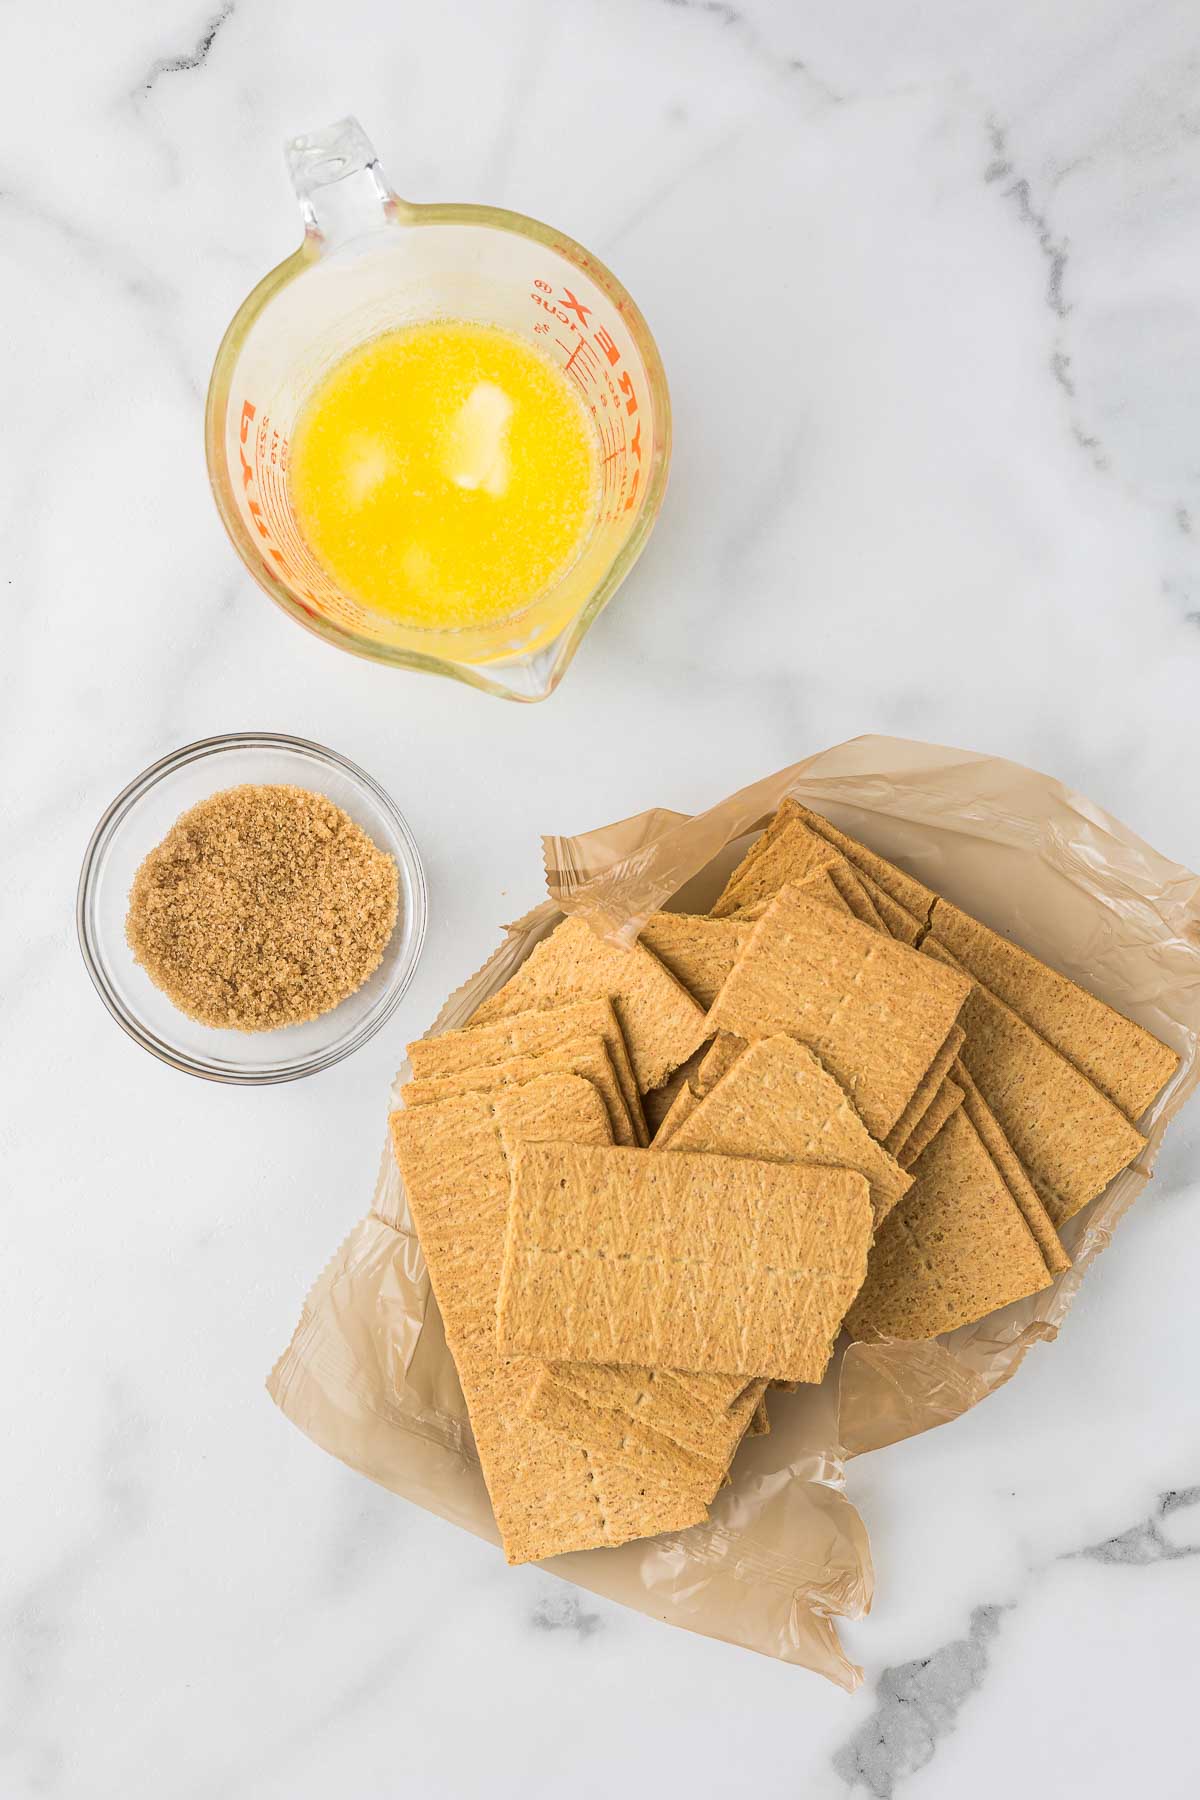
Yes, you only need three ingredients, including graham crackers, brown sugar, and melted salted or unsalted butter.
I’ve used granulated and brown sugar in graham cracker crusts, but I prefer brown sugar, and I tend to use light brown sugar because that’s what is in my pantry. Dark brown sugar will certainly work.
How to make a no bake pie crust
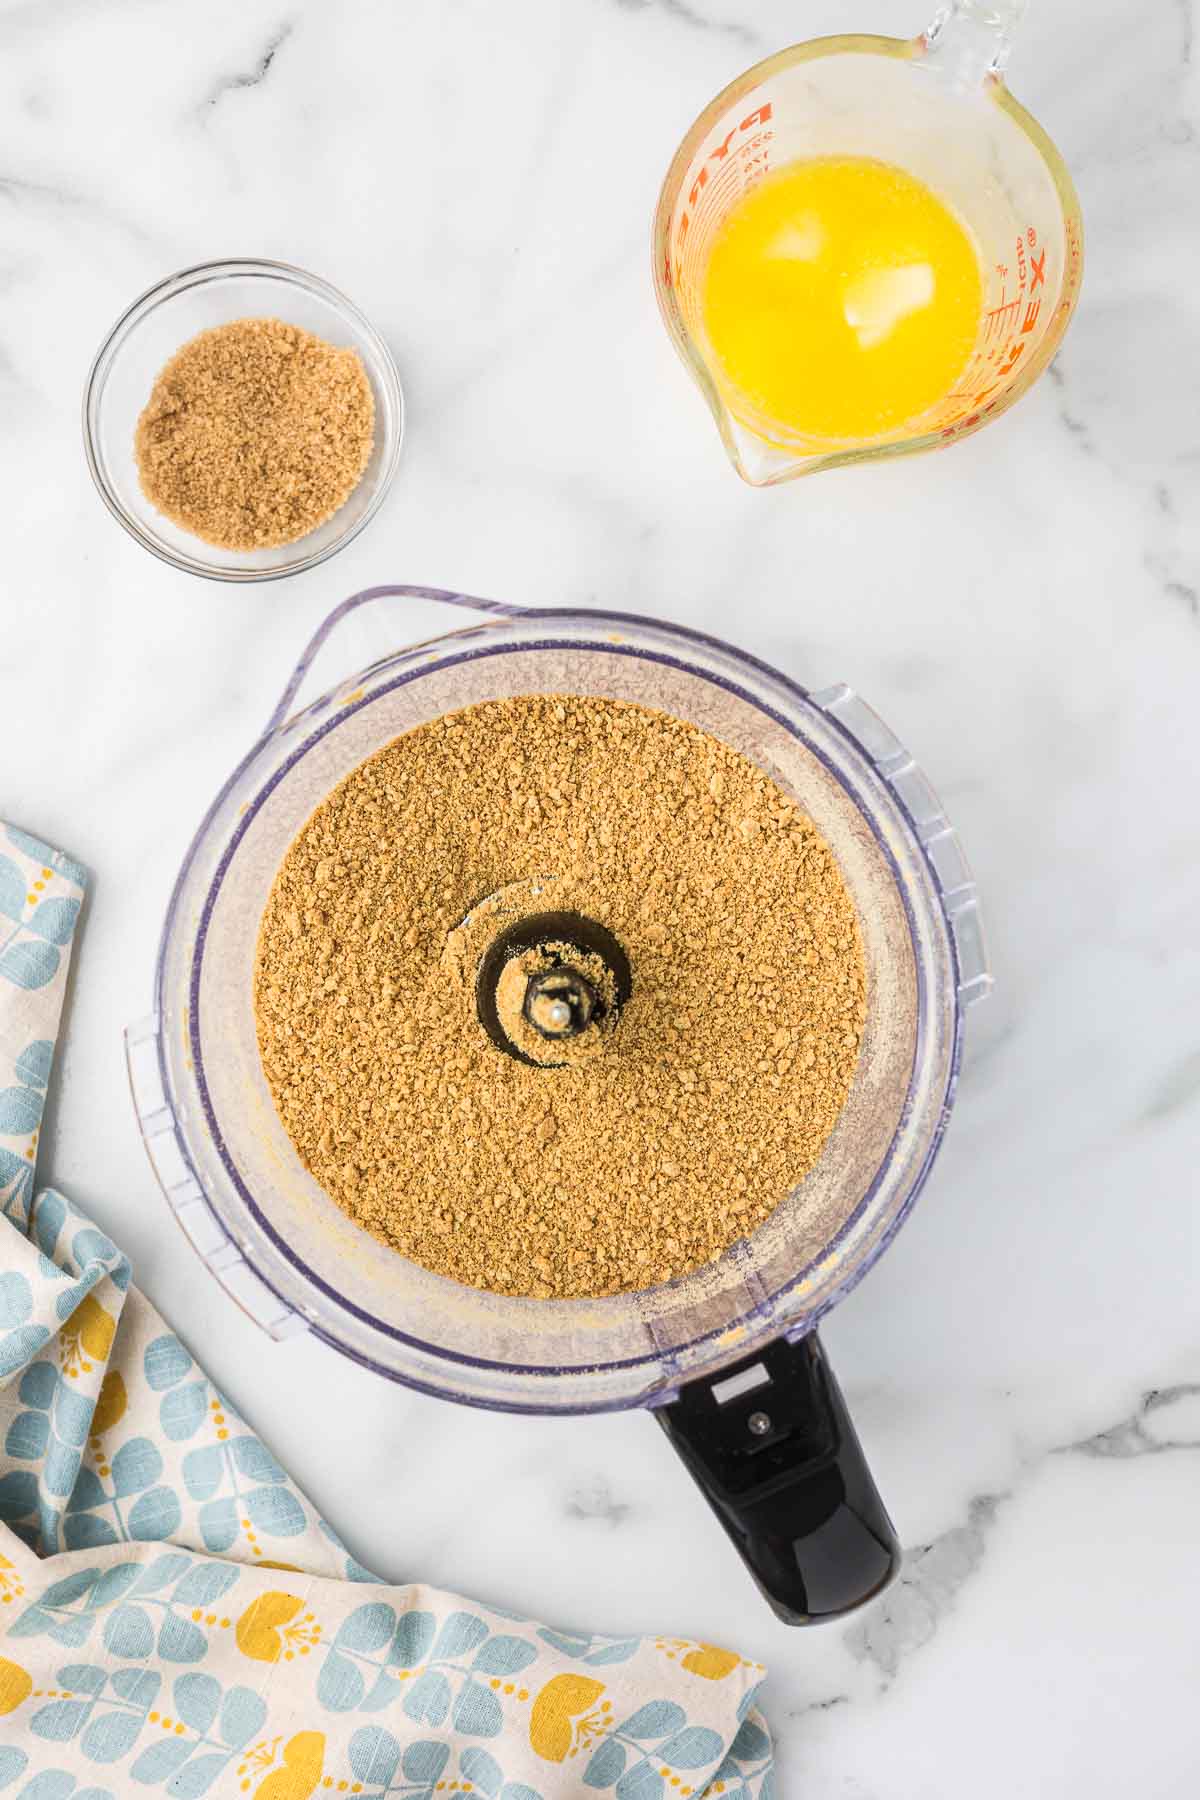
Step 1: Add graham crackers and brown sugar to a food processor and pulse until the crackers are finely ground into crumbs.
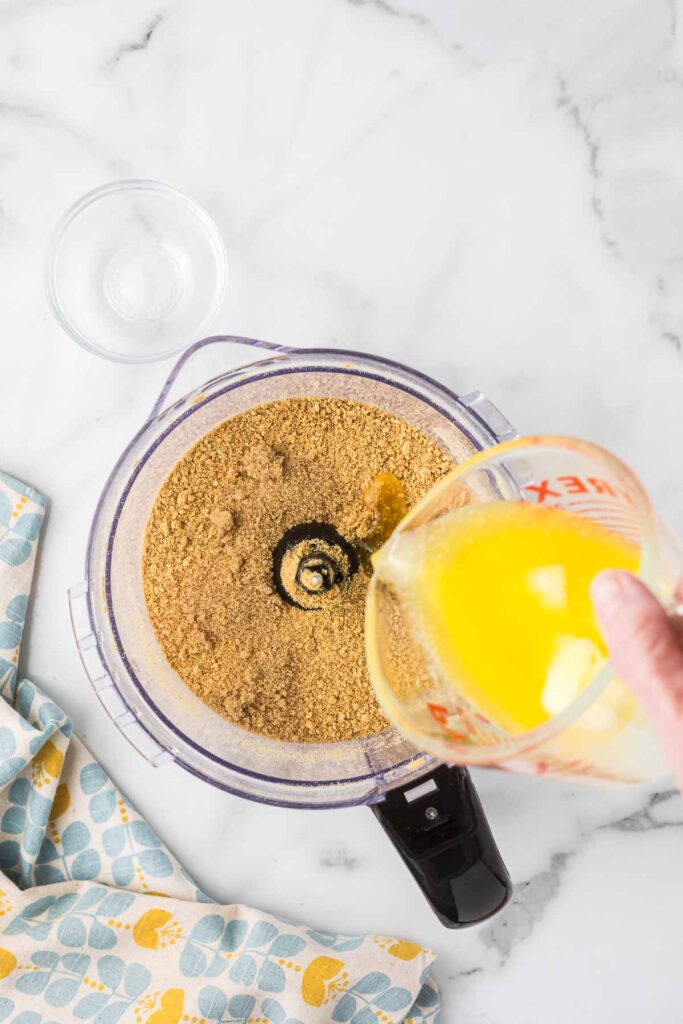
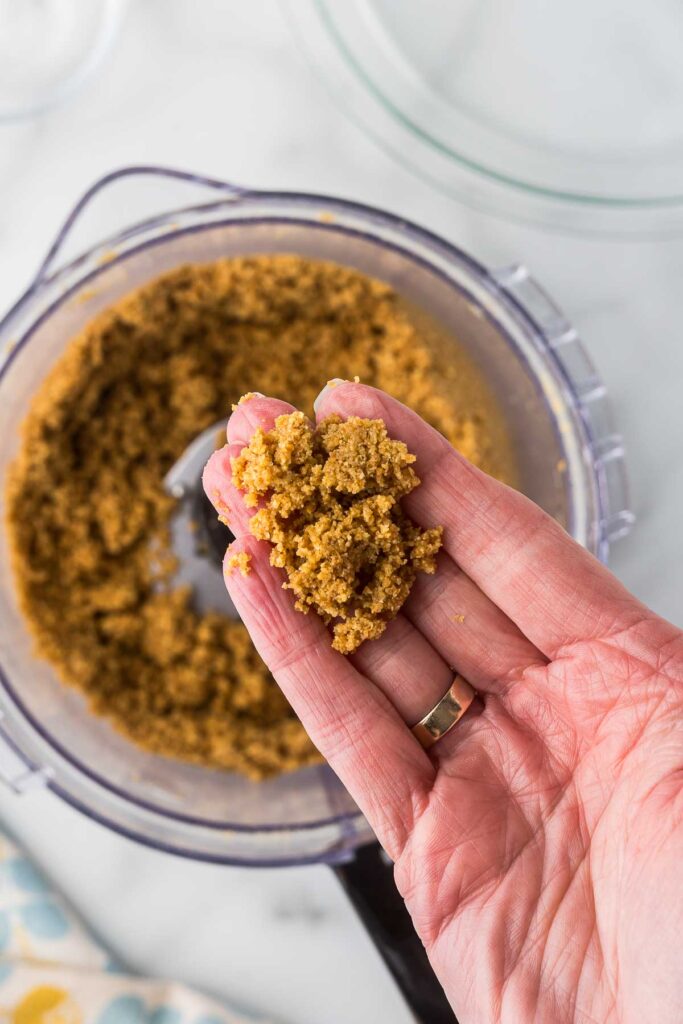
Step 2: Slowly pour the melted butter into the food processor while pulsing the graham cracker mixture. Continue pulsing until the mixture resembles wet sand and holds together when pressed between your fingers.
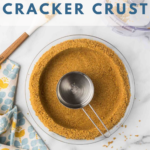
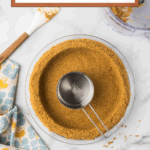
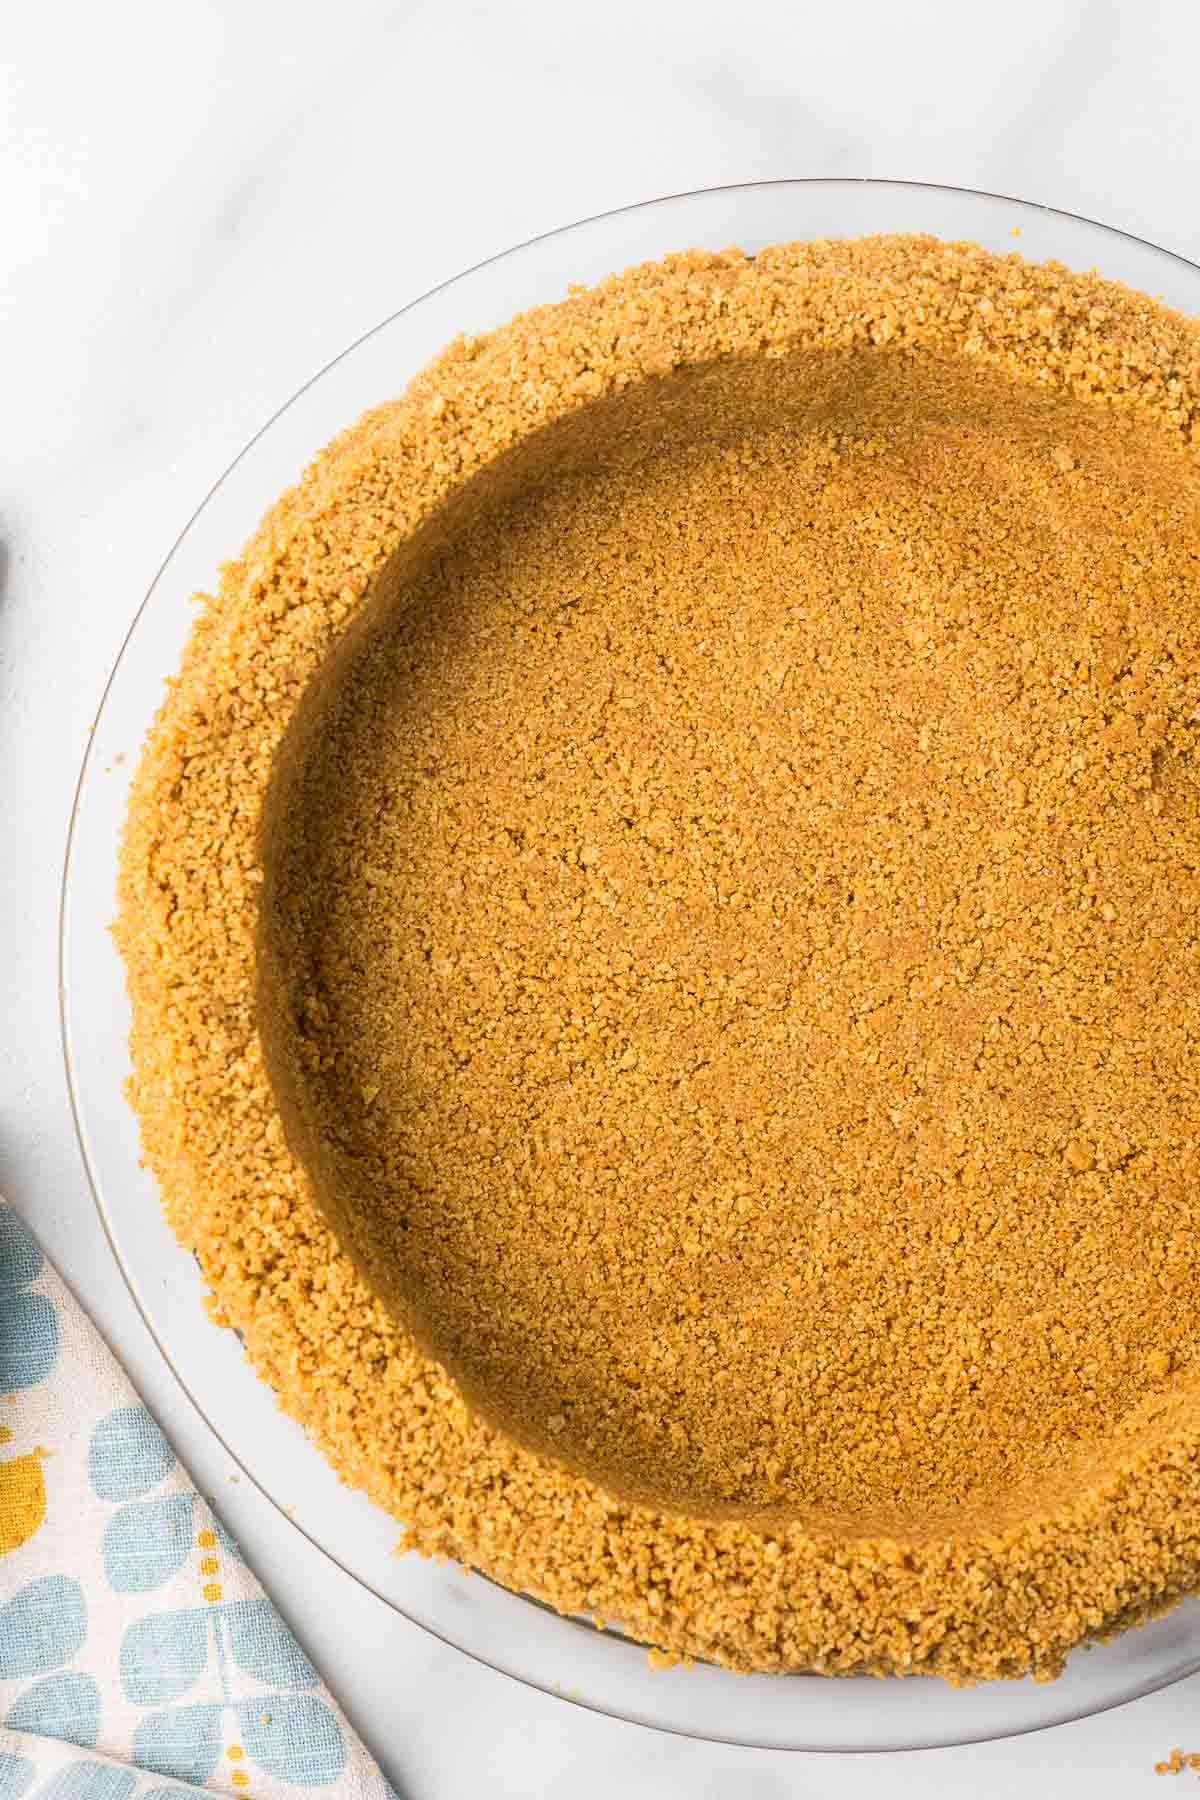
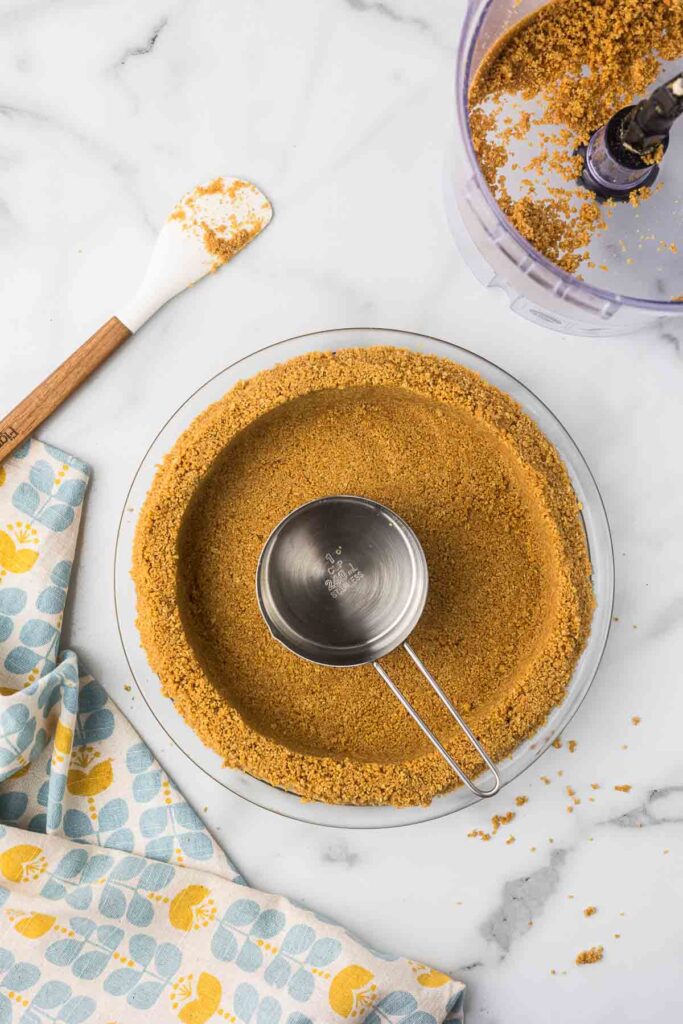
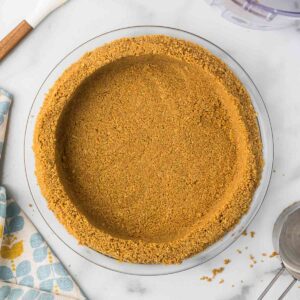
Step 3: Transfer the graham cracker mixture to a 9-inch pie plate, springform pan, or tart pan. Using your fingers or the bottom of a glass or measuring cup, press the mixture firmly and evenly onto the bottom and up the sides of the pan.
Step 4: Transfer the pie dish to the fridge and chill for 30 minutes. Put the pie in the freezer for 15 minutes to shorten the chill time. This will help the crust set.
Kitchen tools to make this no-bake graham cracker crust recipe
Tips for making an easy graham cracker crust recipe
- Getting the crumbs right: Achieve fine crumbs by using a food processor. If you don’t have one, a sealed plastic bag and a rolling pin will do the trick to crush the crackers evenly.
- Press firmly: Firmly pack the crumbs into your pie pan, focusing on an even distribution. This ensures your crust won’t crumble when you slice your dessert, especially around the edges and corners.
- Chill the crust: After pressing the crumbs into your pan, chill the crust in the refrigerator for at least thirty minutes before filling. This step is crucial as it helps solidify the butter, keeping the crust firm and making it easier to slice cleanly once filled and completed.
Should you bake the crust?
Baking the crust is optional. You can bake it at 350 degrees for 10 minutes for a slightly richer flavor. However, I skip baking the crust as I don’t find it necessary.
Should I chill my crust?
Definitely chill the crust. I recommend refrigerating it for at least 30 minutes before filling, or for a quicker set, place it in the freezer for 15 minutes.
Would you like to save this recipe?
What goes best with graham cracker crust?
Pie: Use a graham cracker crust as the foundation for various pies, such as key lime pie, chocolate cream pie, or banana cream pie. It adds a delightful crunch and sweetness that complements creamy fillings.
Bars and Squares: Layer your graham cracker crust with sweetened condensed milk, chocolate chips, coconut, and nuts for a delicious take on magic or seven-layer bars.
Tarts: For a quick and easy tart, fill a graham cracker crust with lemon curd, fruit compote, or pastry cream and top with fresh berries.
Ice Cream Cake: Use the crust as a base for an ice cream cake. Layer it with your favorite ice cream flavors and freeze. Top with hot fudge and whipped cream before serving.
Pudding Pies: Fill the crust with homemade pudding, such as chocolate, vanilla, or butterscotch, and chill. Top with whipped cream for a simple yet satisfying dessert.
No-Bake Fruit Pies: For a refreshing summer pie, spoon a mixture of fresh fruits like strawberries, blueberries, and peaches mixed with a little sugar and lemon juice into the crust and refrigerate.
More no-bake desserts you might enjoy
Cheesecake Stuffed Strawberries
Homemade Graham Cracker Crust
Equipment
- Pie Pan
Ingredients
- 2 1/2 cup Crushed Graham Crackers
- 2 Tablespoon Brown Sugar
- 1/2 cup Melted Butter
Instructions
- Add graham crackers and brown sugar to a food processor and pulse until the crackers are finely ground into crumbs.2 1/2 cup Crushed Graham Crackers, 2 Tablespoon Brown Sugar
- Slowly pour the melted butter into the food processor while pulsing the graham cracker mixture. Continue pulsing until the mixture resembles wet sand and holds together when pressed between your fingers.1/2 cup Melted Butter
- Transfer the graham cracker mixture to a 9-inch pie dish or a springform pan. Using your fingers or the bottom of a glass or measuring cup, press the mixture firmly and evenly onto the bottom and up the sides of the pan.
- Transfer the pie pan to the fridge and chill for 30 minutes. Put the pie in the freezer for 15 minutes to shorten the chill time. This will help the crust set.
Notes
- If possible, use a food processor to achieve finely ground graham cracker crumbs. If you don’t have one, a sealed plastic bag and a rolling pin will do the trick to crush the crackers evenly.
- Firmly pack the crumbs into your pie pan, focusing on an even distribution. This ensures your crust won’t crumble when you slice your dessert, especially around the edges and corners.
- After pressing the crumbs into your pan, chill the crust in the refrigerator for at least thirty minutes before filling. This step is crucial as it helps solidify the butter, keeping the crust firm and making it easier to slice cleanly once filled and completed.
Loved this crust. I always thought you had to bake a graham pie crust, but when I do, they turn hard as a rock, and you can’t cut them. I also like the brown sugar instead of white sugar.
Looks perfect, makes me hungry thinking of all the things you can make with this crust
Please tell me what size pie pan. I’d like to make enough for an 11 inch pan.
Hi! I haven’t tested this recipe in an 11-inch pan, so I can’t say for sure how it will fill it. The crust in this recipe is thicker than most, so it might stretch to an 11-inch pan as is, but you may find it a little thin around the edges.
If you want a buffer, you could mix up an extra couple tablespoons of crumbs and a little more butter. Starting small keeps you from ending up with way too much crust.
If you give it a try, let me know how it goes so I can update my notes!